Last updated on March 29th, 2023 at 01:48 pm
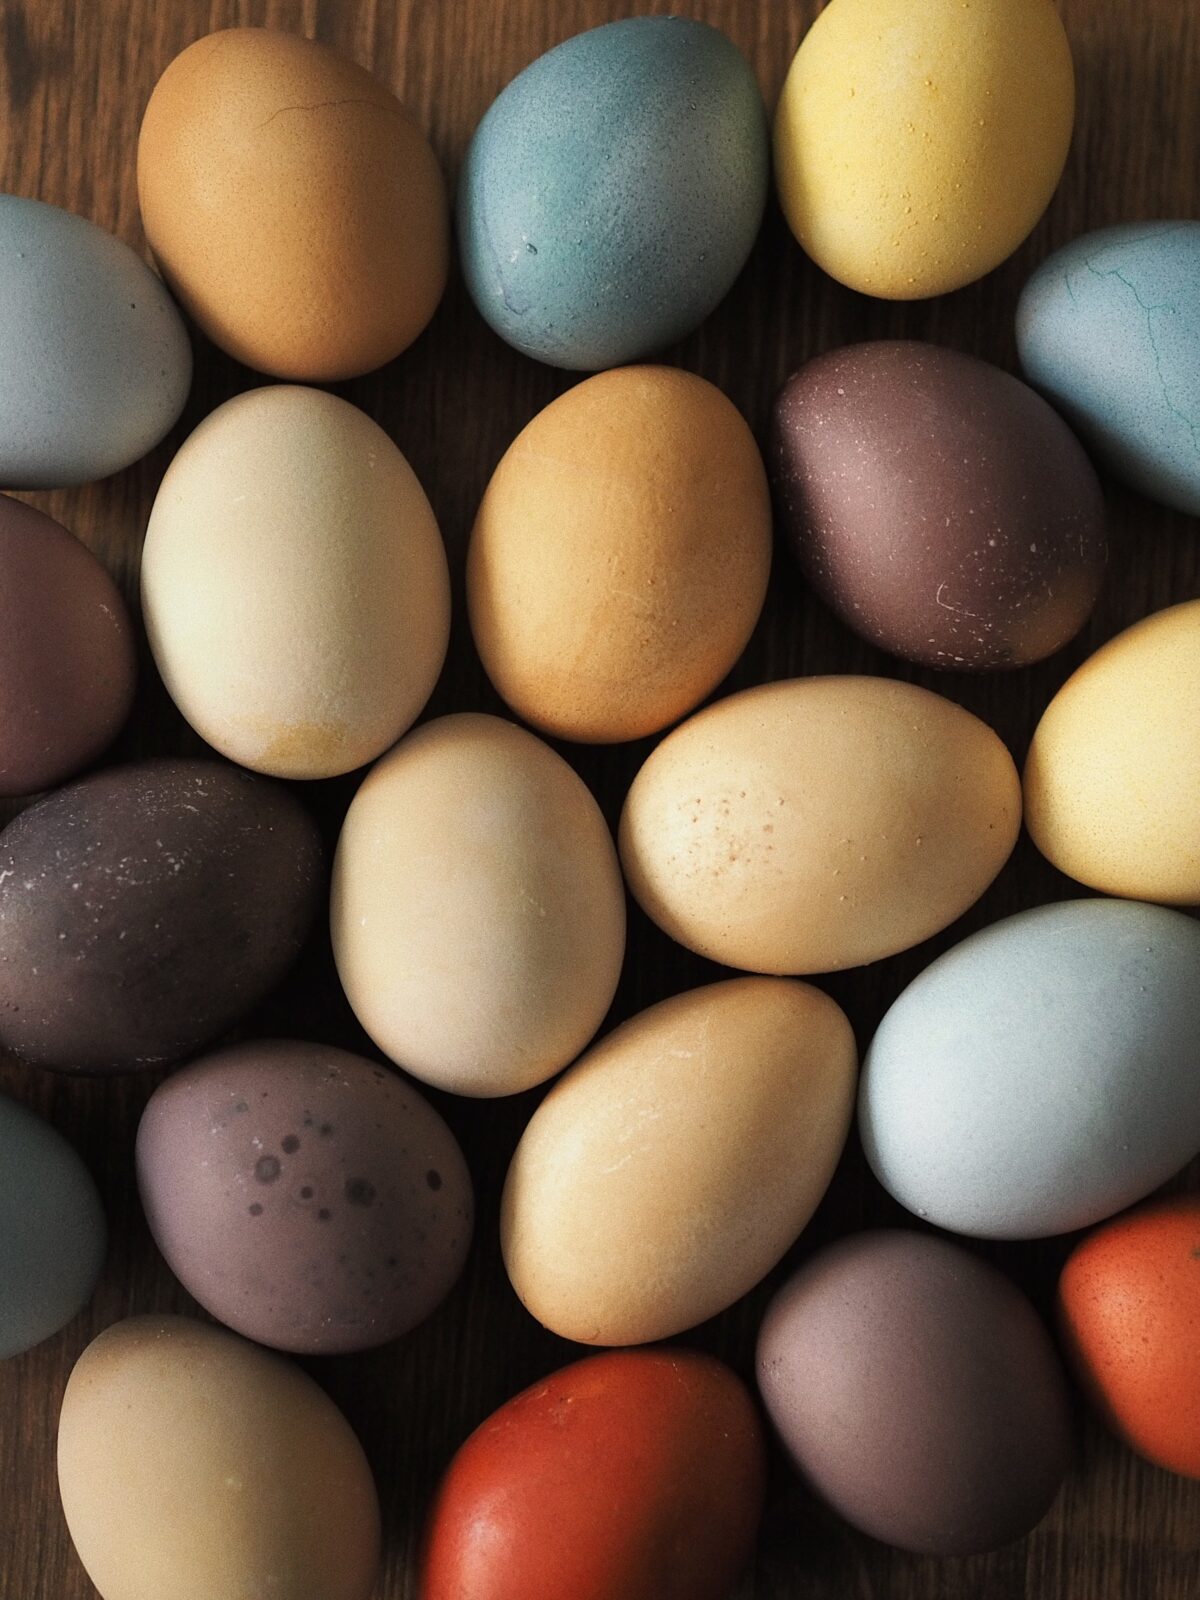
There are so many options and choices for natural Easter egg dye, and something so beautiful happens when using ingredients you already have in your kitchen. I thought it would be super fun to share some options that I love and some tips and tricks on how to switch from chemically filled artificial colors to vibrantly beautiful natural colors.
In my opinion, this method of natural easter egg dye is so much easier and less stressful. Also, if you have been around for a while (or know me personally), you know I love to switch out artificial chemicals and unnecessary chemical additions to food as much as possible. As an example, if I don’t want to eat products with ridiculously long lists of ingredients (and gross chemicals). Why would I add these chemicals as artificial dyes to my kitchen experiments?

Some might argue that we are just dying outside the egg. Still, anybody who has ever colored eggs knows that the colors seep through the shell and color the egg. Therefore it is a no-brainer to make beautifully colored eggs using real food ingredients. It is honestly so simple, why less messy, and fun to experiment and see what colors you can come up with. You can create so many unique eggs; the color will change and become more intense the longer they sit. Our whole family loves to do this together.
So how do you dye Easter eggs naturally?
The first step is to look at your pantry and see what you have to work with. I prefer to use white eggs, but if all you have is brown eggs use them, they will have a slightly different variation. Gather your ingredients and then scroll down for the instructions.
Red/Pink/Brown
Beets: 1 large beet, diced + 2 cups of filtered water
Blue
Red cabbage: 1/2 cabbage sliced + 2 cups of filtered water
Grey/Blue
Blueberries: 2 cups of frozen blueberries + 2 cups of filtered water (just let this steep without boiling)
Deep orange/Brown
Red onion skins: skins from four large red onions + 2 cups of filtered water
Orange
Yellow onion skins: skins from four large yellow onions + 2 cups of filtered water
Yellow
Turmeric: 1/2 cup sliced fresh turmeric or 2 tablespoons dried turmeric + 2 cups of filtered water
Orange/Yellow
Carrots: 2 large carrots, sliced + 2 cups of filtered water
Green
Spinach: 2 cups of fresh spinach + 2 cups of filtered water
Green
Parsley: 1 bunch of parsley + 2 cups of filtered water
Brown
Coffee: 2 cups of strongly brewed coffee
You can also make green-dyed eggs by dying the egg yellow (with turmeric) and then the same egg blue (with red cabbage). You’ll have a lovely natural green color.

Everything you need to know to dye your eggs successfully
1. Make your hard-boiled eggs. I recommend the water boiling method. Also, letting the eggs cool completely to room temperature before coloring is essential.
2. Bring the food item of choice and 2 cups of water to a boil in a small saucepan. Then, cover the saucepan and let simmer for 20 minutes. Then, strain into a glass mason jar and let the dye cool completely. Finally, add two teaspoons of vinegar.
3. Gently drop the eggs into the jar of natural dye. At this point, make sure you completely submerge the eggs in the liquid.
4. The longer you let the eggs sit in the natural dye, the more vibrant the color result will be. Letting the eggs soak overnight yields the best color.
5. Once you are ready to take the eggs out of the natural dye, place an old clean kitchen towel on the counter, place a cooling wire rack on top of the towel, gently pull the eggs from the jars, and lay them on the wire rack. Let the eggs air dry, and do not rub them. If you’d like to dip the eggs again to get a darker hue or combine colors (yellow first, and then blue = green), do it once the eggs have dried.
6. Allow the colored eggs to dry thoroughly before gently rubbing some olive oil to prevent the color from changing. Some colors will change over a few days (especially the beet-colored ones.)
It is essential that the hard-boiled eggs and the natural dye cool to room temperature. This way, the hard-boiled eggs won’t overcook in the natural food dye. Also, safety – you don’t want to burn. Leave the eggs in the natural coloring in the glass jars in the refrigerator overnight.
Why do you need vinegar?
The science behind adding vinegar to the natural dye is that the white vinegar brings the dye concentration to the correct pH for the color to stick to the outside of the eggshell. You only need one teaspoon of vinegar per 1 cup of dye. If you add more vinegar to your natural dye, you will have a super fun spotted effect.
Additional fun tidbits to get the most out of your natural dye
Add more vinegar. Adding more vinegar to the dye creates a bubbly effect, creating some fun dots on the eggs.
Dip for different lengths of time. Try dipping the eggs for shorter or longer periods of time.
Create an ombre effect. Start by dying a batch of eggs, and then every few hours, go ahead and take one of the eggs out of the dye.
Double dipping eggs. Depending on the different colors you have on hand, they can create different effects. It will be different every time, so experiment and have fun.
Not interested in making your own natural easter egg dye? You can always find different, safer products on the market.
These are some great options:
Happy egg dying!


+ view comments